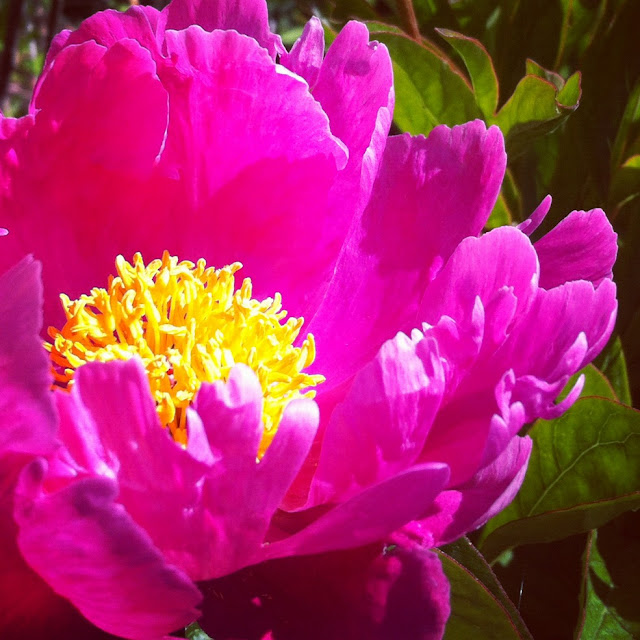
The morning sunlight shining through my some flowers that my grandmother left behind for me. The deep purple Iris and the pastel pink peony remind me each spring of her gentle and loving personality. She always told me pink was her favorite color but she told my sister that purple was her favorite color! We have decided that her favorite color was whatever her grandaughters loved. (Larkspur Delphinium in bud and beginning to bloom).
Viburnum bush with Weeping Cherry in the background.
Allium with orange Wallflower and some Honeysuckle in the background. Allium still stands as one of my all time favorite bulbs, it's beautiful for an extended time and unique to itself.
Bowl of Beauty Peony (One of my favorites in my yard)
On my wish list: Eyeconic Pink Lemonade Rose. I can just picture this beauty in bouquets all over my house and yard tables. Love the vintage colors and look with the lacy petals.
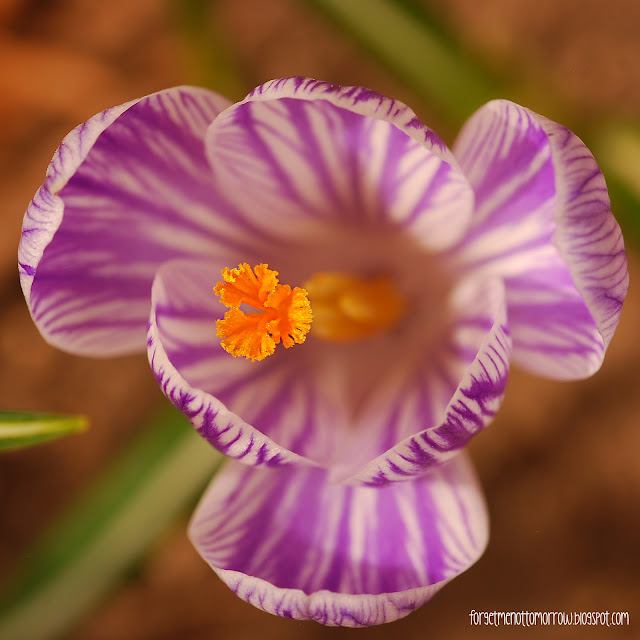
Crocus opening spring! Spring is proving to be just as unusual as winter was. We had a super mild and calm winter season and now spring is acting just as mild, and much warmer than usual! Hopefully it remains warm so that we don't lose all of our fruit crop and all the plants that have started to break dormancy.
Above are crocus with diablo stonecrop creating a beautiful naturalized look. The chick is our first born chick, a cross between a white frizzle cochin and red partridge cochin.
Why not collect all colors of crocus? I'll try for that as long as I can keep my bulb buying secret from the hubby, wink-wink~
My favorite spring flower, the pasque flower (above). I plan to plant many more of these because year after year they are my first to bloom and give me hope that soon I will have warmth! I love their sunny yellow stamen in the centers of rich pink or purple blooms with silvery hair covered foliage. They are outstanding!
An early spring shot taken at my sister in laws. She is an outstanding gardener with amazing design. I love this area that she created over the weekend with a few helping hands. Super cozy, private and inviting.
Magnolias and tulips are always a spring favorite, but this buttery magnolia is so delicous! and the unique tulip deserves a double-take. Both are found @ Heidi's home, Layton UT.
Above: Lime Japanese maple with hostas in the background. The picture above this one is a great tree that is super vibrant in the shady area. I love the roundish leaves that are variegated. Heidi said it is a type of Japanese Maple.
Above is a favorite spot in my backyard, decorating a partial shade area with colorful foliage! Tri-color Beech tree, Jackfrost Brunerra and variegated Jacobs Ladder.

See the upside down butterfly closest to my lens? That's what happens in a gust of wind! I giggle at the onlookers in the background that are watching their friend be carried away!
In Jan. it's time to start designing and putting together the pots! This arrangment of hydrangea, ivy, heather, boxwood, and forsythia was made by my ever talented sister in law, Heidi. This shade loving arrangement will hang out on my patio closest to the house where it will get much attention.

It's time to start the winter sowing and fruit tree pruning! (February- early March)
Winter Sowing: The Plant them and forget about them method of seed growing!
Winter sowing is the process of starting seeds outside during the winter months, eliminating the need for a greenhouse. Winter sowing is the easiest and most effective way I have found to start seeds.
These are some benefits I have enjoyed from using this method: seeds have a better germination rate, it eliminates the need to cold stratify, seedlings won't dampen off due to night time coldness killing the fungus, there is not a need to 'harden off' the seedlings due to them being outside already, you won't have leggy plants trying to reach for sunlight, you rarely have to water the seedlings because of the snow and rain, and you won't have a crazy mess in your greenhouse with trays and fans to keep your plants alive. I have also found that my seeds that are winter sown using this modified method grow much faster and stronger than the ones I have started in greenhouses or windows in my home.
Step 1: Start with a potting or seed starting soil that is not 'moisture control.' Moisten the soil while it is inside the bag and stir to make sure that it is evenly moistened but not soggy.
Step 2: Pick the seeds you would like to start. I started my first batch of winter sow seeds Feb. 4. I am a zone 5a. For the first batch I started all the seeds that needed to be cold stratified for more than 4 weeks. (Lillium Martagon, Snow in Summer, Lamium, Crazy Daisy and Echinacea.)
Step 3: Choose seeds that have similar needs as seedlings. For example: put all full sun plants in flats together with similar germination periods.
Step 4: Plant seeds at depths that the directions state in flats that have drainage holes. Label seeds.
 Step 5: Drill holes in the top of the hydro dome to allow snow and rain to water your seedlings. (Approx 9-12 holes in dome.)
 Step 6: Tape hydro dome onto the flat of planted seeds. Be sure that the tape seals the sides so that cold drafty air cannot enter.
Step 7: Place the flat outside in an area that it will get the light the seeds require and where snow and rain can reach the seeds easily.
Step 8: Watch seedlings grow! Be sure to check flats periodically and if they are starting to look dry then water them.
Step 9: You can begin planting your new plants in the garden as soon as they have 5 true leaves.Note: This is not the traditional way of winter sowing. Most people do it with milk jugs and other recycled plastic containers. I prefer the seed flats because you will save at least 80% of your time by not having to separate roots and transplant the young seedlings into flats like the other method requires. I use the same flats from year to year to keep green ;). You can winter sow most any perennial seed from your garden or learn what other seeds to winter sow at: http://www.wintersown.org/wseo1/Seed_Lists.html
*Spring 2012 brought very dry weather so I had to water my seedlings much more than the 2011 batches. A lot more work but worth it! Also, the milk jug method requires less water.
Propagating
Propagating is another method of starting plants that works great with many varieties. Every year I spend a day with my mom and sisters propagating our favorite plants for the next summer. We generally start this process in February to have a strong rooted plant ready for the outdoors when the time comes in our zone 5, around Mother's Day (approprate that our work would start as a mother-daughter activity and pay off on Mothers Day).Propagating is the simple process of taking clippings from a mother plant, stripping the lower leaves from the cutting, dipping the stem lightly in rooting hormone and then planting the new baby plant in fresh lightly packed potting soil.
Some plants, like fusia and begonias, like it hot so after we complete the steps above we then put a bread bag around the pot and plant to keep them warmer and more moist. The geraniums do well in an open pot as long as we keep them watered reasonably.
Plants we propagate: geraniums, fusia, hydrangeas (be sure they aren't coyrighted), flowering maple, seedum, dogwood, willows, ninebark and many more. Before you try to propagate research and see if the plant works with this method. One I have found that does not is Heleborous.
White Fly Control for Indoor Plants
Above is a picture of a flowering maple infested with white flies. The problem that many of us run into with plants indoors is that we get pests like white flies. A great natural way to get rid of pests like these is to introduce green lacewing (see Chemical Free Pest Control in this blog). During the winter you probably won't be able to get your hands on any green lacewing so option #2 that is also effective is to place the plant in its pot into a large plastic bag. Then just before tying off the bag spray the plant inside with 4-in-1 or any other insecticide you choose. 4-in-1 includes fungicide which is usually needed in indoor plant care also so it is my choice for this method. Be sure to tie off the bag around the plant and leave it tied off for 4-7 days to ensure a complete kill.
 The picture above is representative of one late summer day of gratification, lessons learned and harvest. It took me three years to pull off the veggie garden successfully! The first year we didn't irrigate right because we didn't dig the channels with an exit for the water (got some veggies). The second year we tried our garden in a new spot in the field that proved to be extreme work to irrigate each time, due to the plane of the field (got some veggies and fruits). The third year we moved the garden back to the first spot, my husband built a homemade irrigation sprinkler system an then I used pre-emergent where desired and ordered three sets of green lacewing eggs (I never use pesticides: see my chemical-free section) to rid of the pests. Waa-laa! We did it! We had more food than we could eat even after giving to friends and family!
I LOVE to garden and I am addicted to flowers! For every event there is a bouquet. For every non-event, there is a bouquet! But they are next to never bought because I grow them!
Pinky Winky Hydrangea. One of my very favorites! Hardy in my zone 5a, fairly early blooming, does well in the sun and the blooms last forever and look vintage towards late fall. Ahhhh, beauty.
Above is a part shade hydrangea that I love, Blushing Bride. It's planted on the west and north side of my house but shaded by a large maple tree that my grandparents planted when I was a child. It bloomed from mid June to frost. I dried some of the blooms for my winter bouquets.
Above is my best deal of the season! Little Lamb Hydrangea. The first picture is of it mid-way through it's cycle and the bottom picture is further into the season. When I got it, it was pure white and glowing! But, no time to photograph, I was in the heat of the planting season!!! Anyhow, I bought five of these for $3 each because they were on clearance for fall. The original price was $28 each because it is such a great variety! It doesn't grow as tall and wide as the well known Pinky Winky and the head is not as pointed. But is does great in the sun and holds up through tough winters like Pinky Winky. The blooms never look quite as vintage and have more pure white to pink color than its comparable.
This is a picture of the beginning stage of propagating a start of Diablo Ninebark Bush, and my favorite purple seedum. It's hard to see the seedum tucked more inside the pot but it is an amazing specimen that I haven't seen in any greenhouse since I bought it six years ago! It is so dark at times that it is almost black and it gets a purple/pink fall bloom. It highlights lavender and any yellow, orange or blue bloom just elegantly.
To propagate these plants I cut some of the new growth off of the mother plant, lightly scuffed up the bottoms of the stems and picked off lower leaves, dusted ever so lightly with root hormone, and placed in starting pots with premium soil. A few weeks later = roots! FYI the seedum starts fine without the hormone. It's a super plant.
Another of my favorite Seedum varieties. Easy to find at greenhouses.
This is a very new variety of blanket flower. It accents so many other flowers that I won't name them! But it stands alone as an eye catcher. Variety: Tokajer
This blanket flower sprouted from some of my wild flower seeds. It looks most similar to the variety Burgandy. It may not be that though.
Cosmos are a great super blooming and self seeding flower. Although, I have decided that I like the new shorter varieties that don't get as leggy or tip as much. The shell varieties are fun too.
I grew this Tickseed from seed as well. Super easy to germinate and transplant. And I have to say that I love it! The leaves are so sparse that the plant is all about the blooms.
Above: Spiderwort. I have a love-hate relationship with it. It is a plant that my grandmother planted with the help of a landscaper. I love it because it is early blooming and blooms all summer. But, I hate it because it often tips, and looks like a smashed fat grass for part of the summer.
Bi-color Butterfly Bush. Attracts hummingbirds and all of my favorite beneficial insects. The blooms are amazing and I can't wait to see it when it is full grown at 5' tall! Butterfly bush is a perennial that often times dies to the ground through the winter but grows vigorously as soon as warm weather comes.
This ivory Echinecea looks a bit boring maybe but it is a great highlight to the late summer/fall garden. I love it more every year I have it because it's simplicity shines!
Iced Pinky Winky HydrangeaIced Maple leaf in Kentucky Blue Grass.
This is one view out the back door of our little house. The yard has such a peaceful feeling to it after a snowstorm. In any season there is beauty just outside the door!


